
この記事は GRIPHONE Advent Calendar 2020 13日目の記事です。
サーバーサイドの皆田です。
弊社では、今期、『技術チャレンジプレゼン』という試みがあり、エンジニアが技術的に問題を解決しようという取り組みを行っています。
その中で、ざっくりなんですが『ChatOps』という課題に取り組むことになったので、hubot を slack に連携させてみようと思い、本記事では設定方法を初心者にもわかりやすくまとめてみました。
まず構成を考える
簡単にググってみると、HEROKU を使った記事が多いのですが、リクエスト数とかそういうのを気にしたくないなーと思ったので、自宅で遊んでいたRasberry Pi 4 に hubot を入れて ChatOps を実現してやろうという考えに至りました。
要件
- OS:Raspbian(最初から入ってるキットだったのでそのまま)を使う
- Raspberry Pi にSSH接続してhubotを扱いたい
- slackとつないでみて何かさせたい
本記事では Raspberry Pi(ラズベリーパイ:以下ラズパイ)を使っていますが、AWS 上に配置して SSH 接続しても良いはずなので、そういった応用が利きやすい構成を考えました。
では、早速環境を整えてみましょう。
Raspberry Pi 4側の設定
起動して、ネットワークにつながっている状態というのは前提条件としておきます。モニタやキーボード、マウスを最小限に使うことにしたいので、最低限なことだけして抜けます。
ユーザーを追加して管理したいので、ユーザー追加して権限付与しておきます。
私はハンドルネームとして echoes を使っているので、本記事で echoes と出てきたらユーザー名に置き換えてください。
ユーザー作成
$ sudo adduser echoes
ユーザー `echoes' を追加しています...
新しいグループ `echoes' (1001) を追加しています...
新しいユーザー `echoes' (1001) をグループ `echoes' に追加しています...
ホームディレクトリ `/home/echoes' を作成しています...
`/etc/skel' からファイルをコピーしています...

新しい UNIX パスワードを入力してください:(パスワードを入力)
新しい UNIX パスワードを再入力してください:(もう一回入力)
passwd: password updated successfully
Changing the user information for hogehoge
Enter the new value, or press ENTER for the default
        Full Name :(特に入力する必要がなければそのままEnter)
        Room Number :(同上)
        Work Phone :(同上)
        Home Phone :(同上)
        Other []:(同上)
以上で正しいですか? [Y/n] y
sudoできるようにしておく
$ sudo gpasswd -a echoes sudo
ユーザechoesをグループ sudo に追加
解説するのをサボりたいのでリンク貼っておきます。
参考:Raspberry Pi 4 にSSHとVNCで接続してみた
ラズパイ の設定を見てください。この記事の SSH を有効にするだけ参考にしました。
端末側の操作
WSL2のターミナルを起動し、下記コマンドを打つだけで SSH 接続は可能です。
$ ssh echoes@raspberrypi
The authenticity of host 'raspberrypi (192.168.3.42)' can't be established.
ECDSA key fingerprint is SHA256:OaBeSWHfG4JkeuhdEnZQfXfzAl3w/KYdnsvJwZxL6O8.
Are you sure you want to continue connecting (yes/no/[fingerprint])? yes
Warning: Permanently added 'raspberrypi' (ECDSA) to the list of known hosts.
echoes@raspberrypi's password:
Linux raspberrypi 4.19.97-v7l+ #1294 SMP Thu Jan 30 13:21:14 GMT 2020 armv7l

The programs included with the Debian GNU/Linux system are free software;
the exact distribution terms for each program are described in the
individual files in /usr/share/doc/*/copyright.

Debian GNU/Linux comes with ABSOLUTELY NO WARRANTY, to the extent
permitted by applicable law.

Wi-Fi is currently blocked by rfkill.
Use raspi-config to set the country before use.
初期状態では root がパスワード保護されていないので、変えておきます。
ラズパイ側の設定時にやっておけば良さそう・・・でもある。
$ sudo passwd root
[sudo] echoes のパスワード:
新しいパスワード:
新しいパスワードを再入力してください:
passwd: パスワードは正しく更新されました
SSH 接続方法を見直す
raspbian (ラズビアン)は初期設定状態では SSH はパスワード接続になっているので、証明書で接続するようにしておきたいですね。
なければ、.sshをホームディレクトリに作っておき、700に設定してから下記を実行しましょう。
echoes@raspberrypi:~ $ ssh-keygen -t rsa
Generating public/private rsa key pair.
Enter file in which to save the key (/home/echoes/.ssh/id_rsa): id_rsa_rasp
Enter passphrase (empty for no passphrase):
Enter same passphrase again:
Your identification has been saved in id_rsa_rasp.
Your public key has been saved in id_rsa_rasp.pub.
The key fingerprint is:
SHA256:J7upR+o0stQ3NxwBZxf2PTPrxaGA/SJYj0j7RoL9Z4c echoes@raspberrypi
The key's randomart image is:
+---[RSA 2048]----+
|        . o +.   |
|         +oo . . |
|       . o.o  .=.|
|      + = o.o ..*|
|     . *S+oo o .o|
|     .  *=..o . .|
|    o +o+++E . . |
|   . +.oo=o..    |
|    ..ooo        |
+----[SHA256]-----+
公開鍵を登録し、パーミッションを設定します。
$ cat ~/.ssh/id_rsa_rasp.pub >> ~/.ssh/authorized_keys
$ chmod 600 ~/.ssh/authorized_keys
もうひとつターミナルを開いておいて、下記コマンドで秘密鍵をダウンロードします。
$ cd .ssh
$ scp echoes@raspberrypi:~/.ssh/id_rsa_rasp .
ラズパイ側につないでいるターミナルで、鍵が不要になったので削除します。
$ rm id_rsa_rasp.pub
$ rm id_rsa_rasp
次に、パスワードでの SSH 接続を無効化しておきましょう。
ラズパイ側のターミナルでファイルを開いて編集します。
$ sudo vi /etc/ssh/sshd_config

この行をコメント外してnoにします
# PasswordAuthentication yes
↓
PasswordAuthentication no

次に、以下内容を任意の場所に行追加
PubkeyAuthentication yes
設定を反映させるためにsshサーバーを再起動します。
$ sudo /etc/init.d/ssh restartWSL2 で SSH 接続テスト
$ ssh -i .ssh/id_rsa_rasp -p 22 echoes@raspberrypi
Linux raspberrypi 4.19.97-v7l+ #1294 SMP Thu Jan 30 13:21:14 GMT 2020 armv7l

The programs included with the Debian GNU/Linux system are free software;
the exact distribution terms for each program are described in the
individual files in /usr/share/doc/*/copyright.

Debian GNU/Linux comes with ABSOLUTELY NO WARRANTY, to the extent
permitted by applicable law.
Last login: Sun Nov 22 15:22:56 2020 from 192.168.3.32

Wi-Fi is currently blocked by rfkill.
Use raspi-config to set the country before use.
SSH 接続する度に書くコマンドとしては長いので、WSL2 側の config を設定しておきましょう。
$ vi ~/.ssh/config
以下内容を追記して保存します。
Host raspi
    HostName raspberrypi
    User echoes
    Port 22
    IdentityFile ~/.ssh/id_rsa_rasp
これで OK そう。以下コマンドで接続できるようになりました。
$ ssh raspiHubotをセットアップしてみよう
やっとここから hubot です。SSH 接続後、以下を実行していきましょう。
必要なツールをインストール
◆ラズパイのraspbianを更新
$ sudo apt update
◆Redisをインストール
$ sudo apt install redis-server
◆nodejsのインストール
$ sudo apt install -y nodejs npm
$ sudo npm cache clean -force
$ sudo npm install npm -g
$ sudo npm install n -g
$ sudo n lts
◆npmの更新(更新しないとnodejsとのバージョンが合わないと怒られた)
$ sudo npm install npm@latest -g
◆hubotのインストール
$ sudo npm install -g yo generator-hubot
hubotをセットアップ
slackbot という名前で作っていこうと思います。
$ mkdir slackbot
$ cd slackbot
$ yo hubot
? ==========================================================================
We're constantly looking for ways to make yo better!
May we anonymously report usage statistics to improve the tool over time?
More info: https://github.com/yeoman/insight & http://yeoman.io
========================================================================== Yes
                     _____________________________
                    /                             \
   //\              |      Extracting input for    |
  ////\    _____    |   self-replication process   |
 //////\  /_____\   \                             /
 ======= |[^_/\_]|   /----------------------------
  |   | _|___@@__|__
  +===+/  ///     \_\
   | |_\ /// HUBOT/\\
   |___/\//      /  \\
         \      /   +---+
          \____/    |   |
           | //|    +===+
            \//      |xx|

? Owner User <user@example.com> # そのままリターン
? Bot name slackbot # 名前つけてあげた
? Description A simple helpful robot for your Company
? Bot adapter slack # 今回はslackにつなぐよ!
   create bin/hubot
   create bin/hubot.cmd
   create Procfile
   create README.md
   create external-scripts.json
   create hubot-scripts.json
   create .gitignore
   create package.json
   create scripts/example.coffee
   create .editorconfig
                     _____________________________
 _____              /                             \
 \    \             |   Self-replication process   |
 |    |    _____    |          complete...         |
 |__\\|   /_____\   \     Good luck with that.    /
   |//+  |[^_/\_]|   /----------------------------
  |   | _|___@@__|__
  +===+/  ///     \_\
   | |_\ /// HUBOT/\\
   |___/\//      /  \\
         \      /   +---+
          \____/    |   |
           | //|    +===+
            \//      |xx|

npm WARN deprecated request@2.88.2: request has been deprecated, see https://github.com/request/request/issues/3142
npm WARN deprecated har-validator@5.1.5: this library is no longer supported
+ hubot-diagnostics@1.0.0
+ hubot-help@1.0.1
+ hubot-redis-brain@1.0.0
+ hubot@3.3.2
+ hubot-google-translate@0.2.1
+ hubot-heroku-keepalive@1.0.3
+ hubot-pugme@0.1.1
+ hubot-scripts@2.17.2
+ hubot-maps@0.0.3
+ hubot-google-images@0.2.7
+ hubot-rules@1.0.0
+ hubot-shipit@0.2.1
+ hubot-slack@4.8.1
added 160 packages from 126 contributors in 23.311s
いくつかワーニングは出ているが、いけたっぽい。
bot名と adapter を slack と指定したところ以外はリターンで素通りしました。
$ npm install coffee-script@^1.12.6
$ rm hubot-scripts.json
$ vi external-scripts.json
"hubot-heroku-keepalive", ← この行を削除して保存
hubot起動
/home/echoes/slackbot 内で bin/hubot とタイプして起動しちゃいます。
$ cd ~/slackbot
$ bin/hubot
audited 160 packages in 2.961s

2 packages are looking for funding
  run `npm fund` for details

found 0 vulnerabilities

slackbot> [Mon Nov 23 2020 01:18:04 GMT+0900 (日本標準時)] WARNING Loading scripts from hubot-scripts.json is deprecated and will be removed in 3.0 (https://github.com/github/hubot-scripts/issues/1113) in favor of packages for each script.

Your hubot-scripts.json is empty, so you just need to remove it.
[Mon Nov 23 2020 01:18:05 GMT+0900 (日本標準時)] INFO hubot-redis-brain: Using default redis on localhost:6379
[Mon Nov 23 2020 01:18:05 GMT+0900 (日本標準時)] INFO hubot-redis-brain: Data for hubot brain retrieved from Redis
起動確認
slackbot> slackbot ping
slackbot> PONG
hubot と Slack をつなげよう
slack のグループを作ったら以下のような URL にアクセスしてみましょう。
URL内の hogehoge は任意の設定したものになります。
https://hogehoge.slack.com/services/
下の画像では、hogehoge が会社名なので、右上に弊社のロゴが出ていますね。
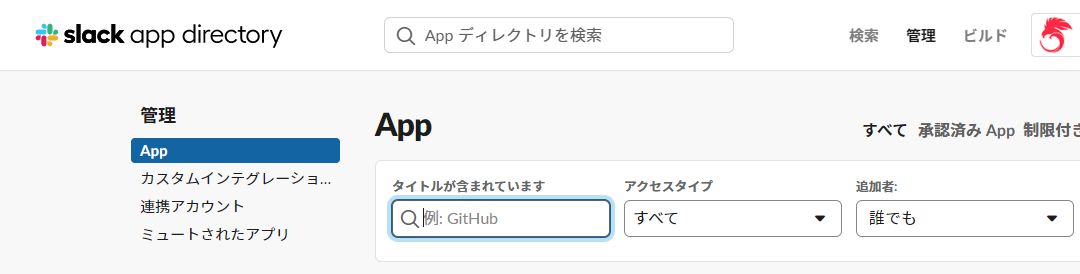
上部中央の検索ボックスで「hubot」と検索してみます。

こんな感じの結果が出てきたので迷わずクリックします。
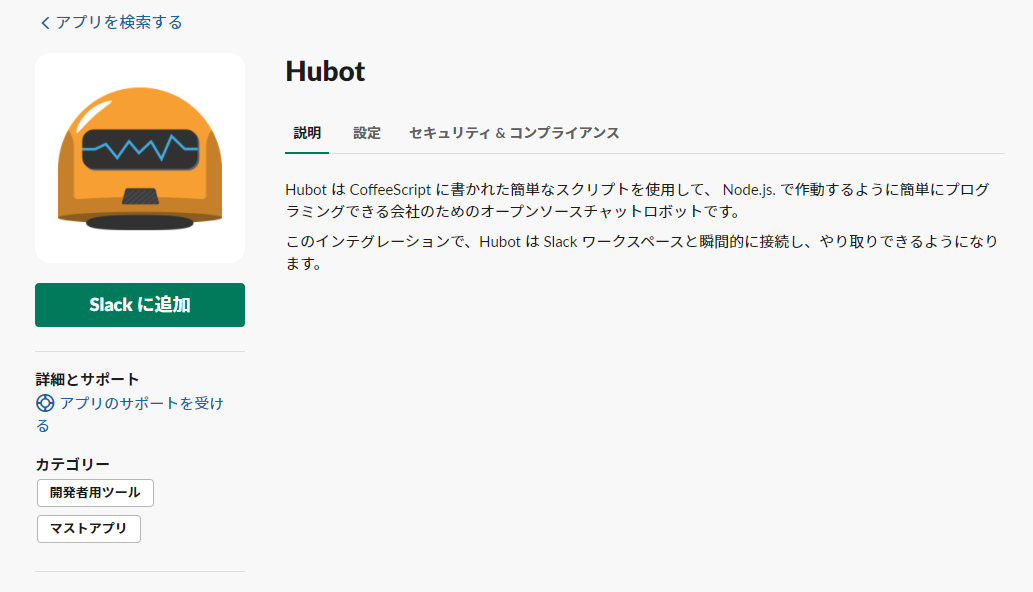
ここは素直に「Slackに追加」を押しておきましょう
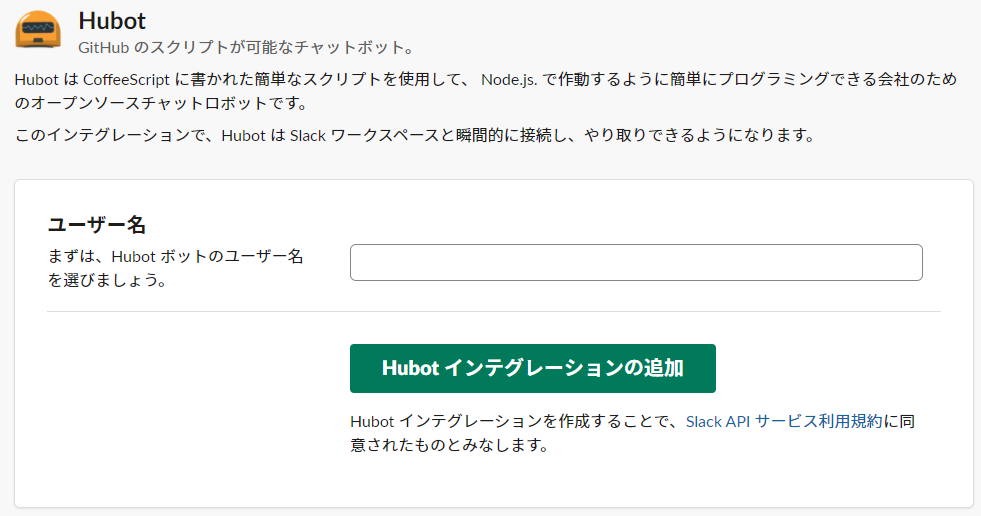
今度は hubot の slack でのユーザー名を付けてあげ、「Hubot インテグレーションの追加」を選びます。
ここでは hubot-echoes としてみました。
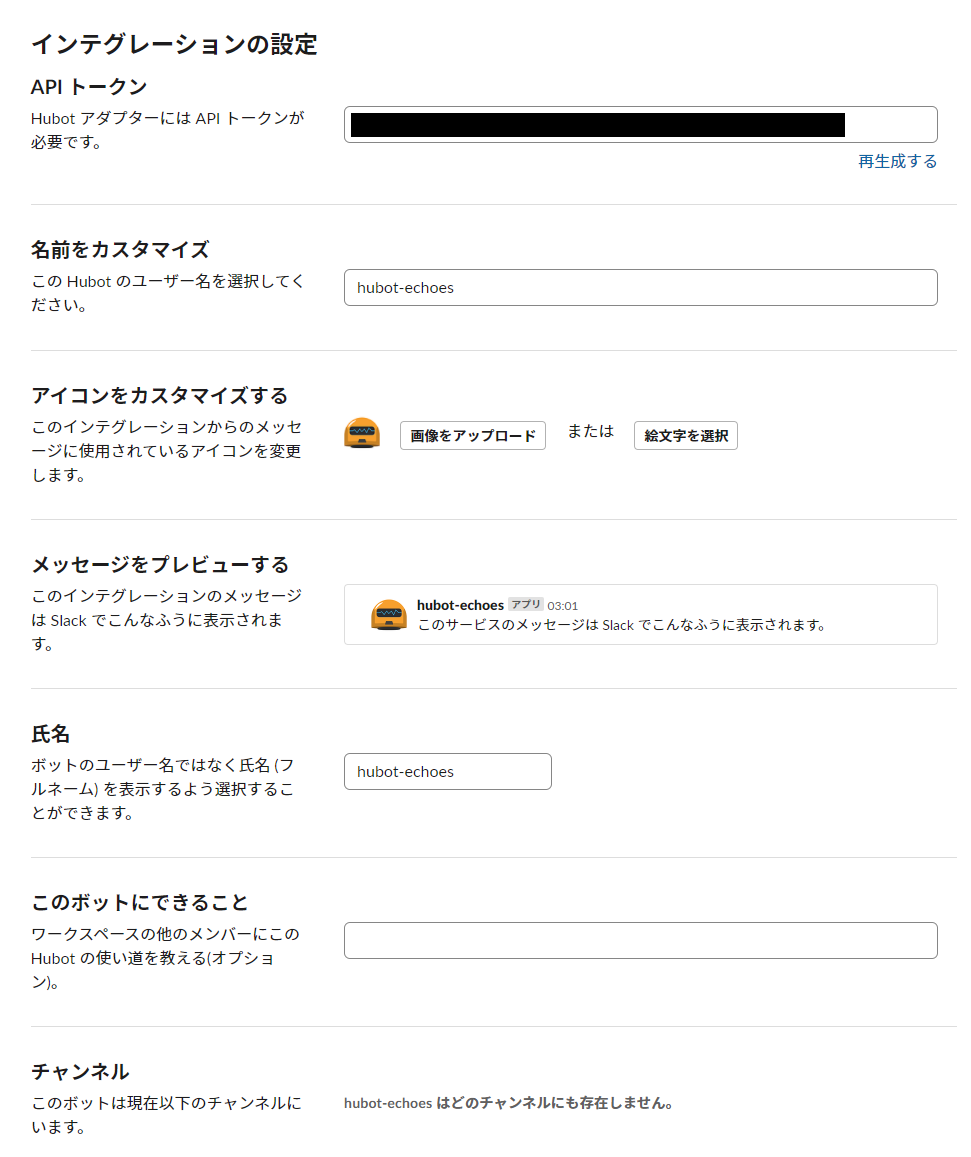
すると以下のような画面が出てくるので、氏名とかも設定してあげましょう。
トークンは塗りつぶさせていただきました。
Slack アプリの左下にある「+ アプリを追加する」をクリックし、検索ボックスに hubot と入れてみましょう。

説明を書いておいたので、「ChatOps的な何か」と出てくれています。
自分だけのチャンネルを作って、@hubot-echoes を招待しておきました。
hubot-echoes をクリックして「設定」を選ぶと slack の設定画面に飛べるのでそこで随時変更できそうです。
次に、ラズパイに SSH 接続したターミナルに戻ります。
$ vi ~/slackbot/bin/hubot
export PATH=hogehoge の下に以下追記して保存します。
export HUBOT_SLACK_TOKEN=fugafugafugafuga
トークンは先の塗りつぶしたところに表示されていたやつです。
/home/echoes/slackbot ディレクトリにてアダプタを実行します。
$ cd ~/slackbot
$ bin/hubot --adapter slack
slack 側で疎通確認をします。
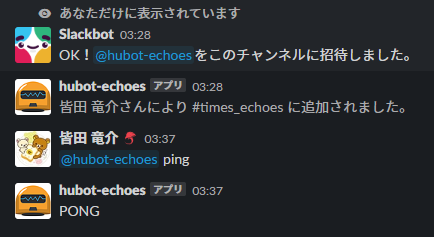
返ってきたー!!というわけでつながりました。
試しに簡単なことをさせてみます。
$ cd ~/slackbot/scripts
$ vi hello.coffee
module.exports = (robot) ->
  robot.hear(/hello/i, (res) ->
    res.reply("hi")
  )
hello と話しかけると hi と返してくれます。
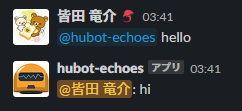
スクリプトも実行できたー!!
スクリプトの書き方
HUBOT DOCUMENTATION へのリンクをご紹介しておきます。
簡単なのはココを見ればすぐわかるかと。
他にも使っておられる記事は多数あるので、GitHub や Qiita で紹介されているものをご参考にされるのも良いかと思います。
SSH 切断しても hubot を動かしたい
SSH 接続しているターミナルを閉じると hubot が反応してくれなくなります。
これは SSH プロセス下に hubot がいるため、SSH 接続を閉じるとプロセス自体がいなくなり、hubot も終了してしまうためです。
バックグラウンドで実行
バックグラウンドで hubot に起きていてもらえれば問題ないので、 nohup コマンドで回避しましょう。
$ ssh raspi
$ cd slackbot
$ pwd
/home/echoes/slackbot
$ nohup bin/hubot --adapter slack &
[1] 6144
$ nohup: 入力を無視し、出力を 'nohup.out' に追記します
これで SSH 接続を切断しても hubot は動き続けてくれます。
nohup したプロセスを閉じる
設定変更など行った際に再起動してあげたくなること、ありますよね?
ps コマンドで hubot の adapter slack が動いているやつがわかるので、そのプロセス番号を指定して止めてあげましょう。
$ ssh raspi                        # ラズパイにSSH接続
$ ps aux | grep hubot     # プロセスを確認
echoes    6144  6.2  1.9 189972 77232 ?        Sl   13:11   0:07 node node_modules/hubot/node_modules/.bin/coffee node_modules/.bin/hubot --name slackbot --adapter slack
echoes    6215  0.0  0.0   3916   576 pts/1    S+   13:13   0:00 grep --color=auto hubot
$ kill 6144                         # プロセスを殺す
AWS など SSH 接続しなければならない場所に hubot を置くなんてことをした場合でもこれで安心して使えそうですね。
最後に
今回は、ChatOps の一歩手前までを準備してみました。
年内には Jenkins で何かさせたり、GitHub で何か action させてみたりしてみたいと思います。
本記事は長くなってしまったので、ChatOps 的な何かに関しては別途記事にしたいと思います。
簡単に想像しただけでも夢は広がりそうなので、このような技術を用いて業務改善していきたいですね。